Git Hub에서 ID/PW기반의 Basic Authentication 인증을 금지하고,
ID/Personal Access Token 방식의 Token Authentication 인증을 요구하고 있다.
앞으로는 소스코드를 push/clone하려고 하면, 아래와 같은 문구가 뜨면서 잘 되지 않는 상황이 발생할 수 있다.
Password authentication is temporarily disabled as part of a brownout.
Please use a personal access token instead.
Please see https://github.blog/2020-07-30-token-authentication-requirements-for-api-and-git-operations/ for more information.
물론 메일로도 아래와 같은 Deprecation Notice 경고 메시지를 여러 차례 보내 왔을 것이다.
You recently used a password to access the repository
Basic authentication using a password to Git is deprecated and will soon no longer work.
Visit https://github.blog/2020-12-15-token-authentication-requirements-for-git-operations/ for more information around suggested workarounds and removal dates.
지금부터 Git Hub에서 요구하는 personal access token 을 이용한 로그인 방법을 정리한다.
생각보다 아주 아주!! 쉽다!!!
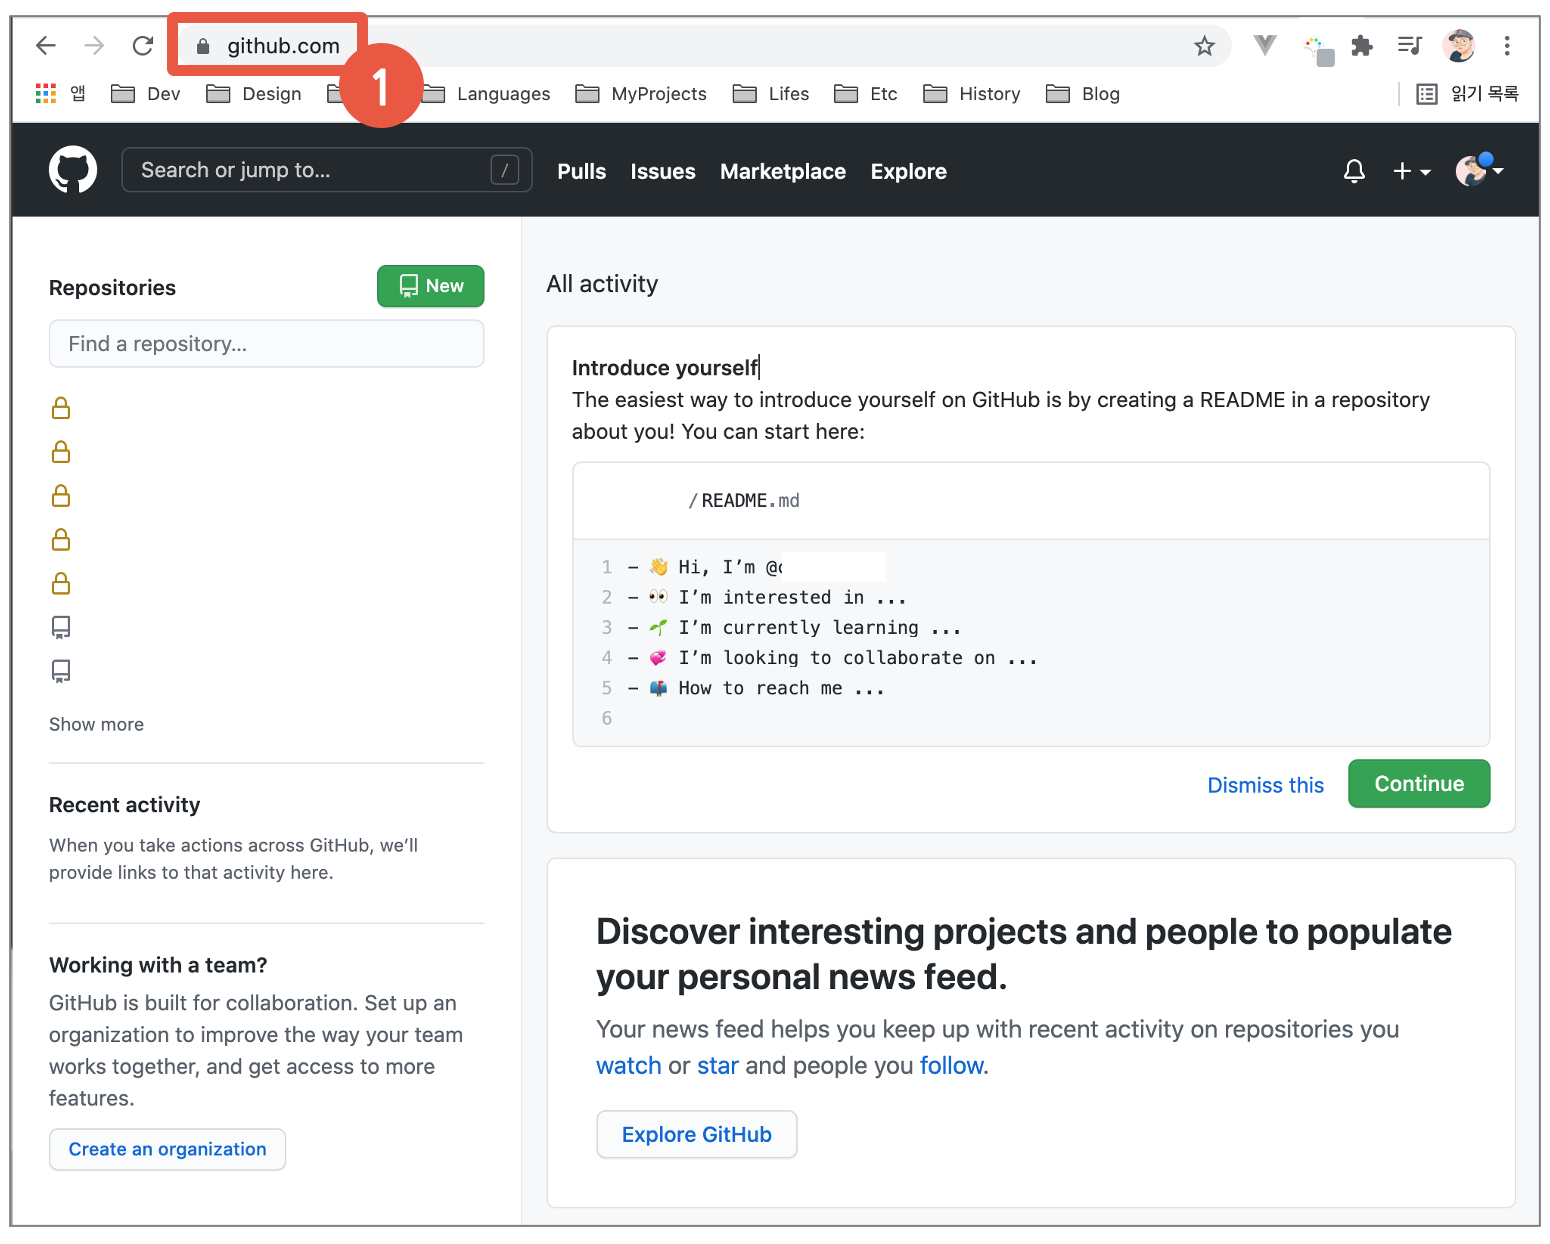
1. GitHub.com 접속 및 로그인
: https://github.com/ 접속 후, 로그인을 한다
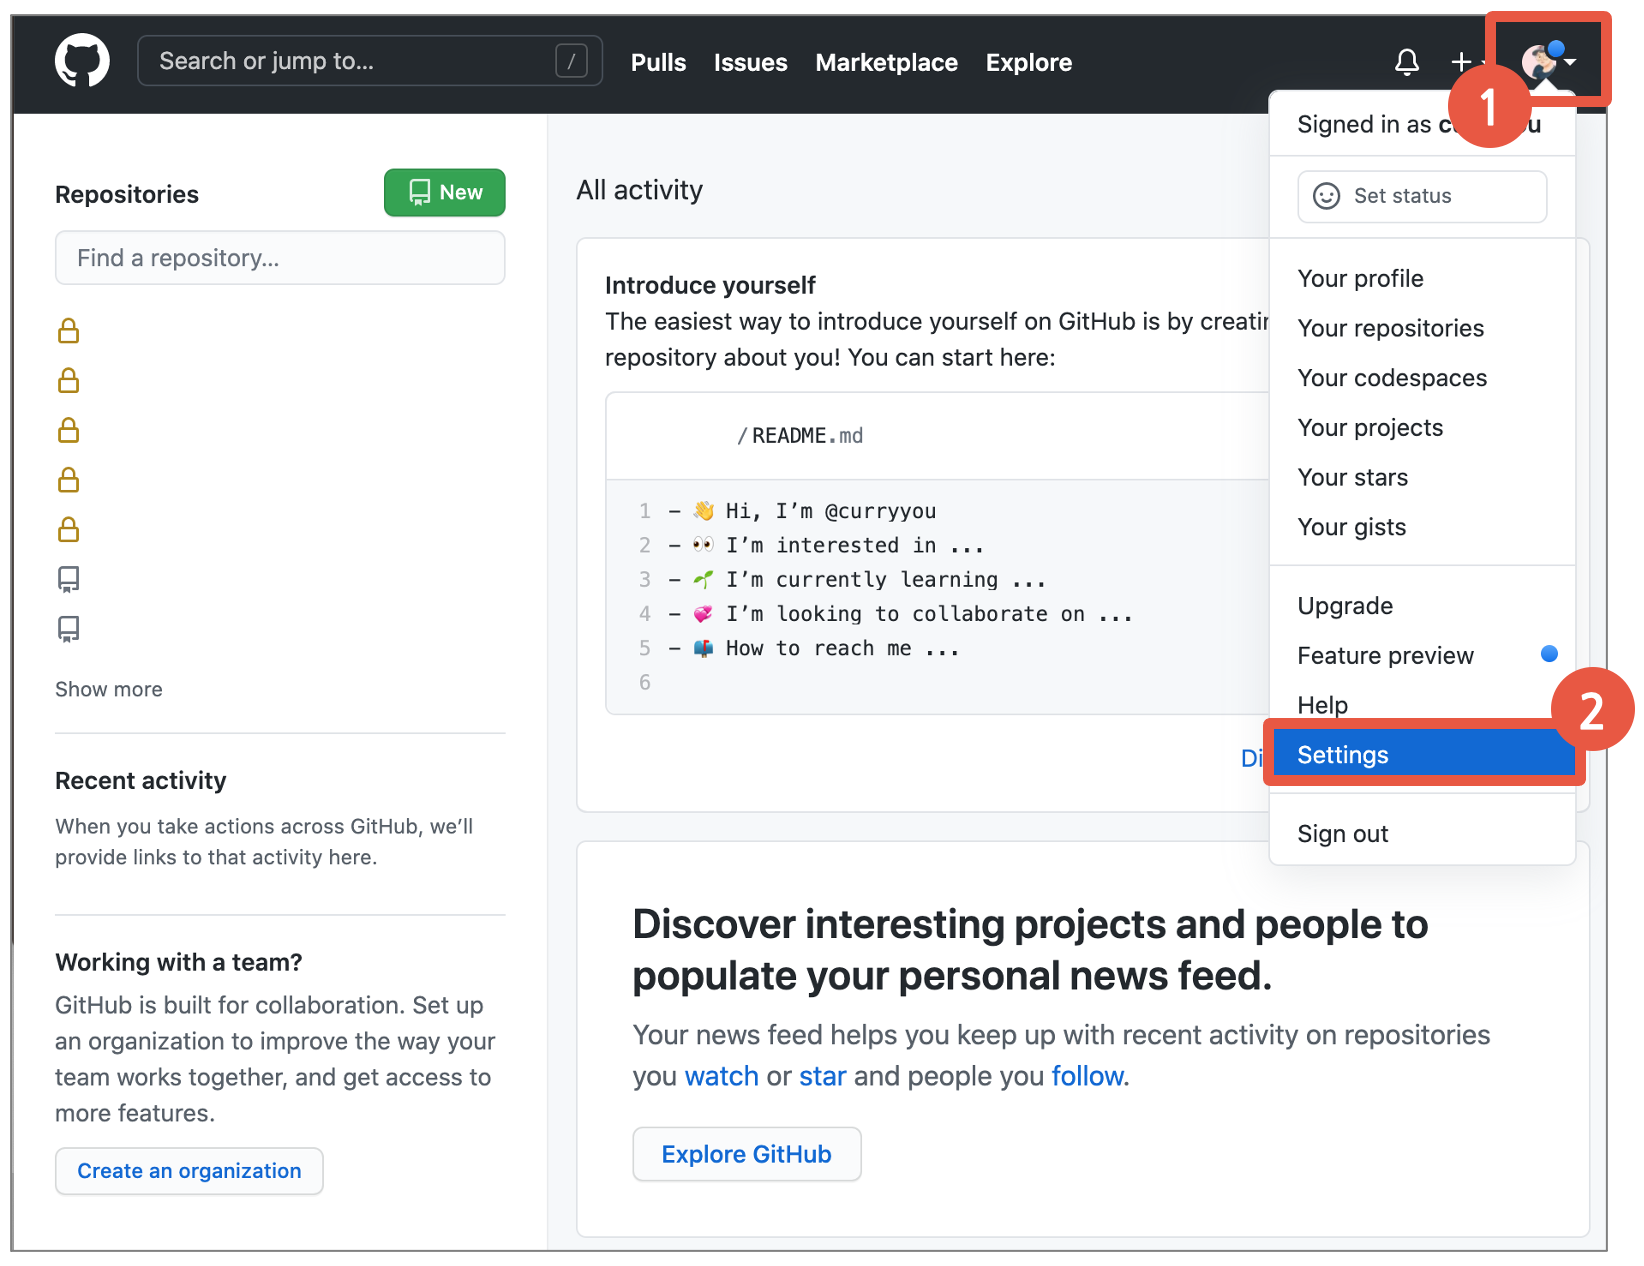
2. Settings 접근
: 우상단의 Profile영역을 클릭후, Settings 접근
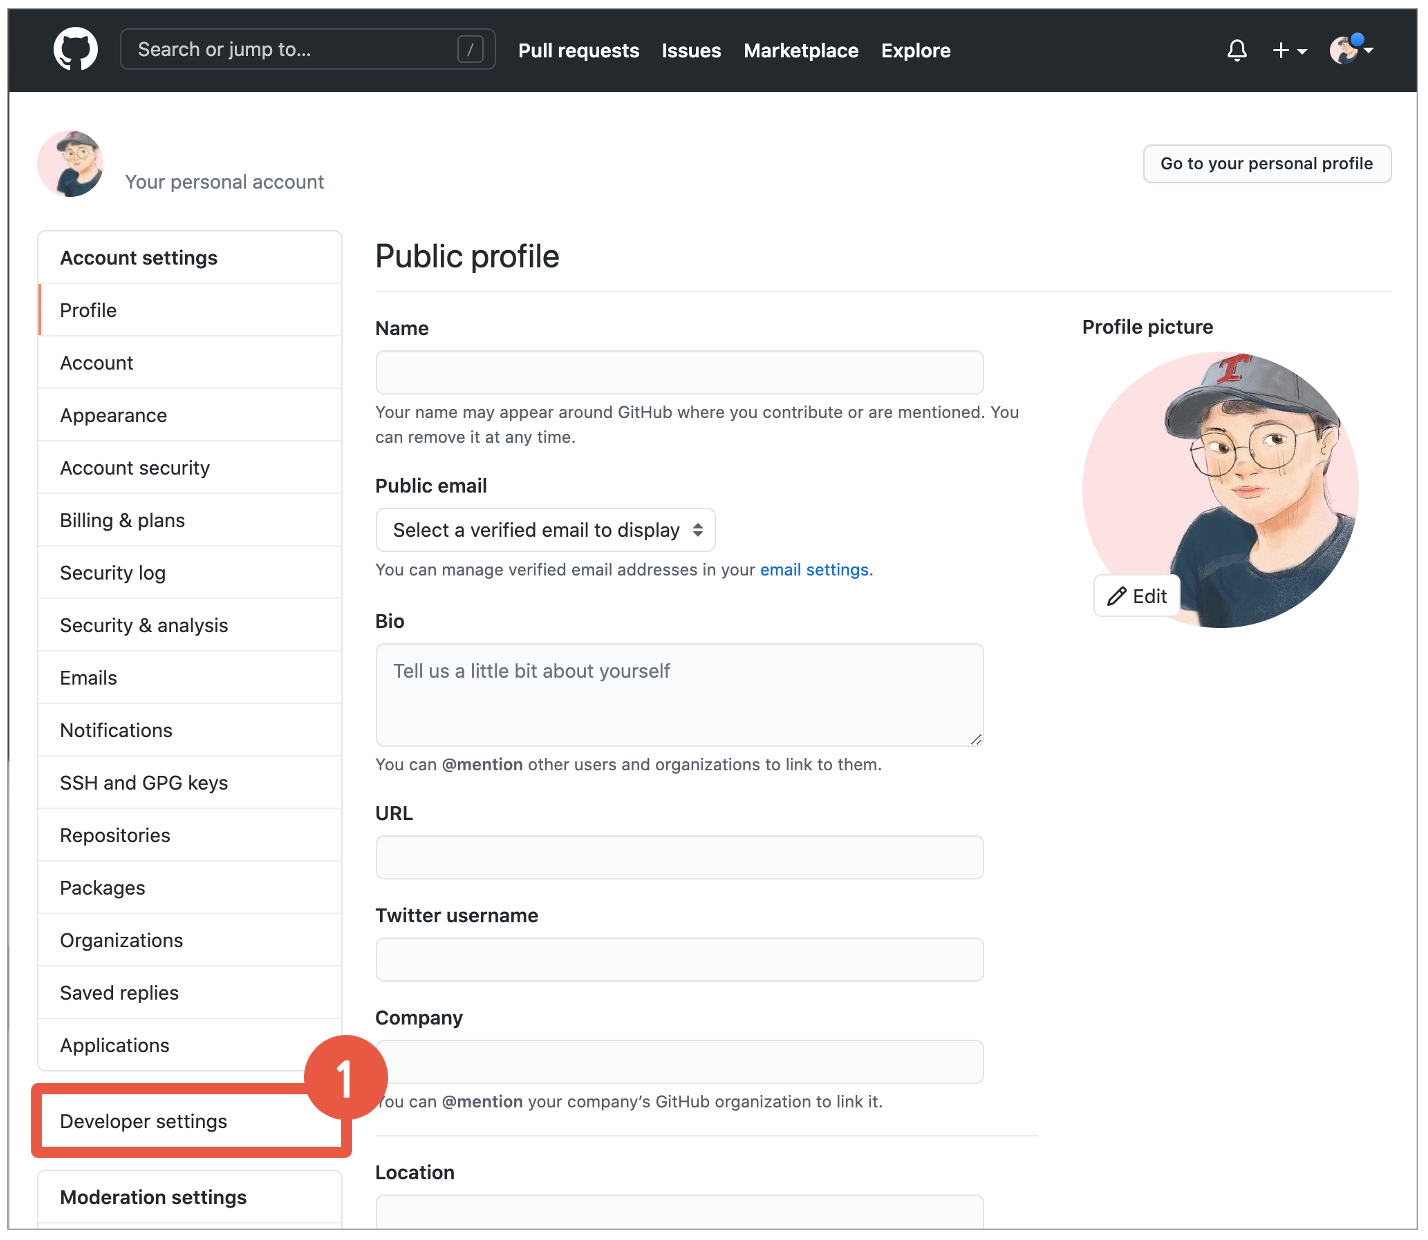
3. Deveoper Settings 접근
: 화면 좌상단의 Deveoper Settings 메뉴로 진입한다.
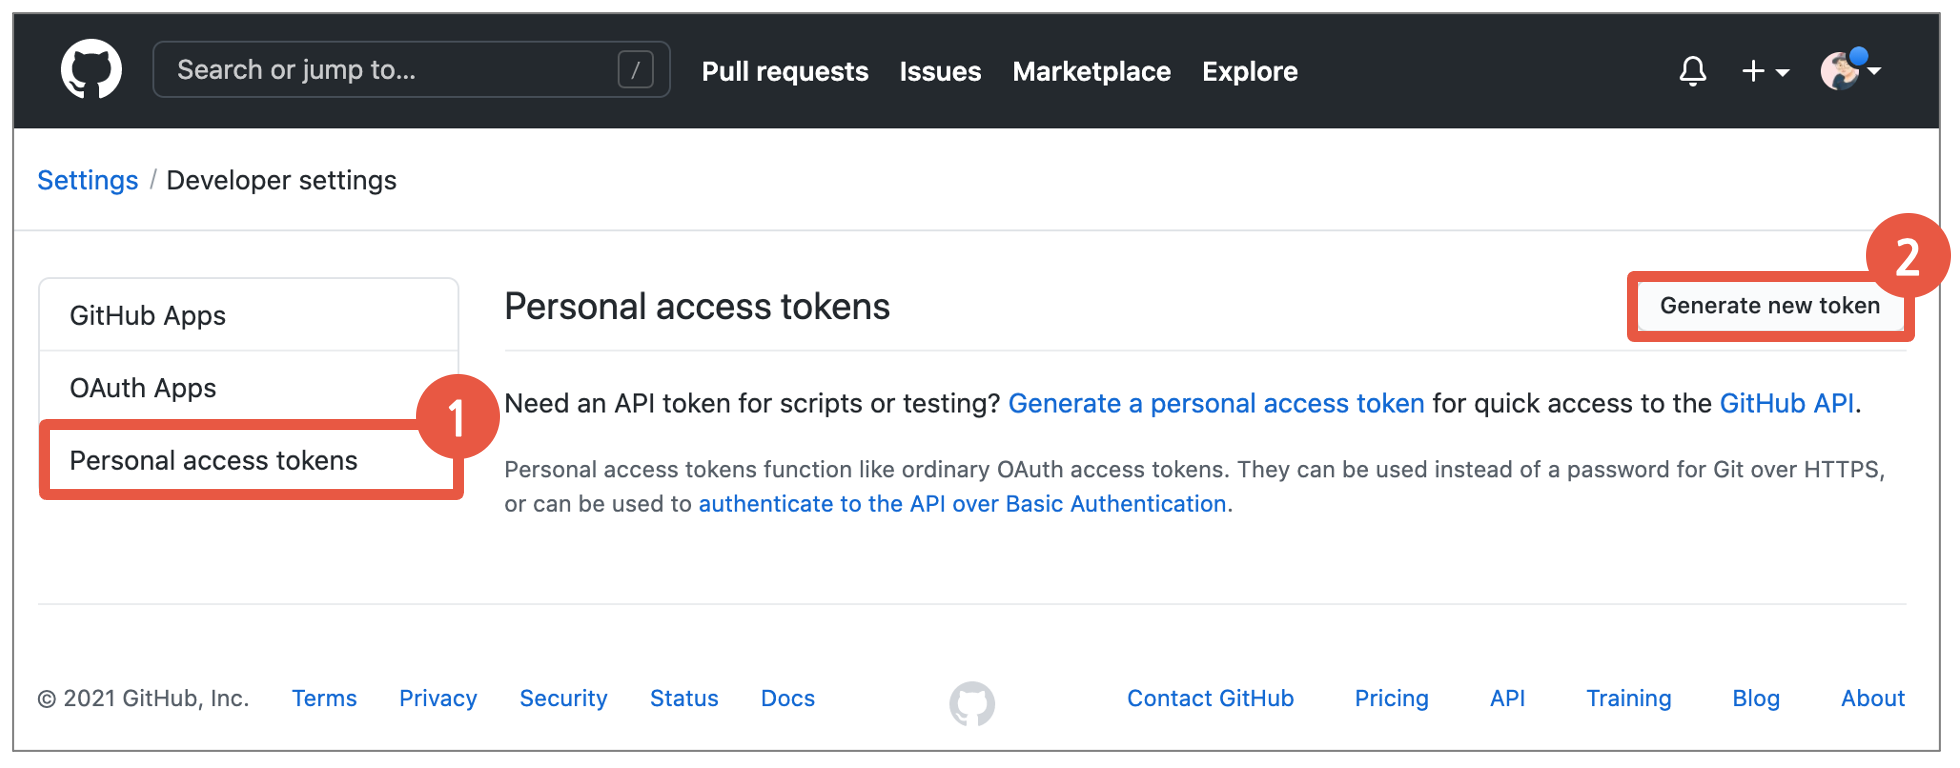
4. Personal Access Tokens > Generate New Token
: 좌상단의 Personal Access Tokens 진입 후, Generate New Token 버튼 클릭!
5. 비밀번호 재입력
사용자 확인을 위해 비밀번호를 다시 한번 입력한다.

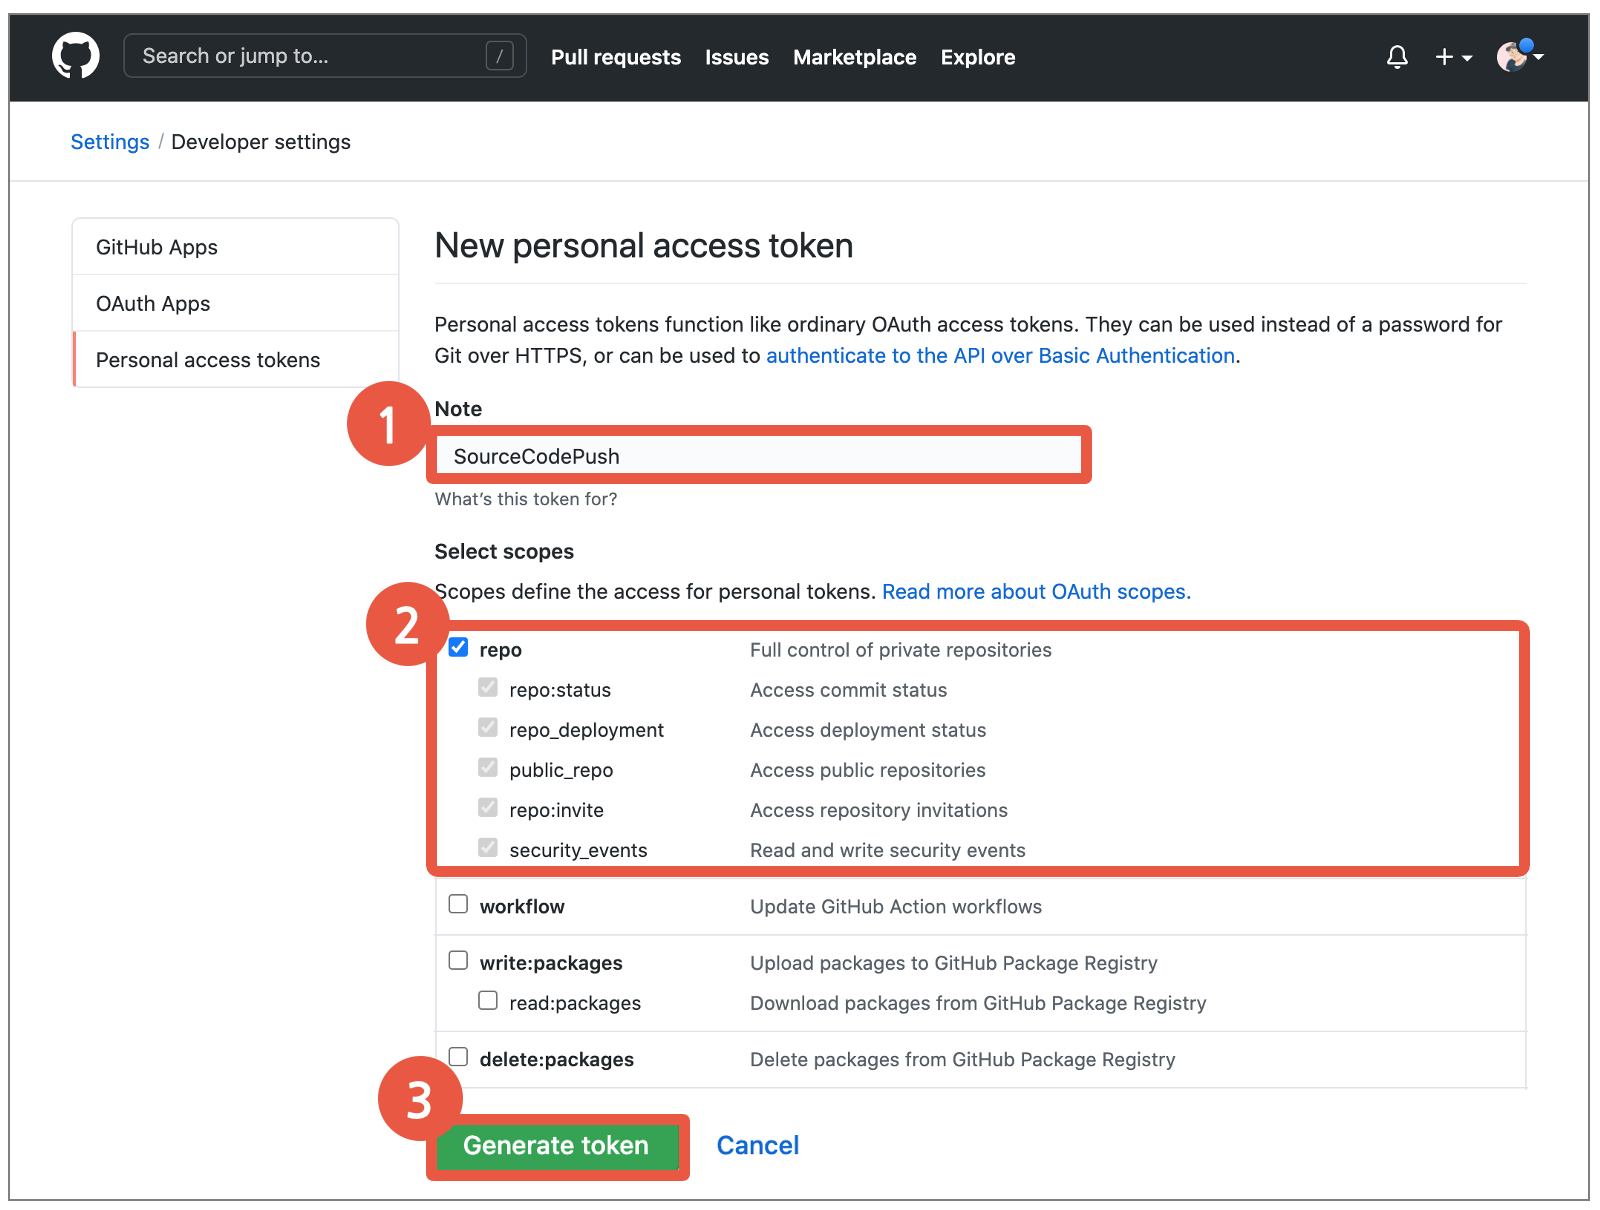
6. Access Token 생성
1) Note: 무슨 용도의 토큰인지 이름을 지어준다.
2) Select Scopes: 해당 토큰에 부여할 권한을 선택한다.
* 레퍼지터리 관리 정도만 할 거라면 repo에 체크해준다. 이 부분은 각자의 상황에 맞게 설정!
3) Generate Token: 토큰을 생성하는 버튼을 클릭해준다.
7. Personal Access Token 확인 및 복사
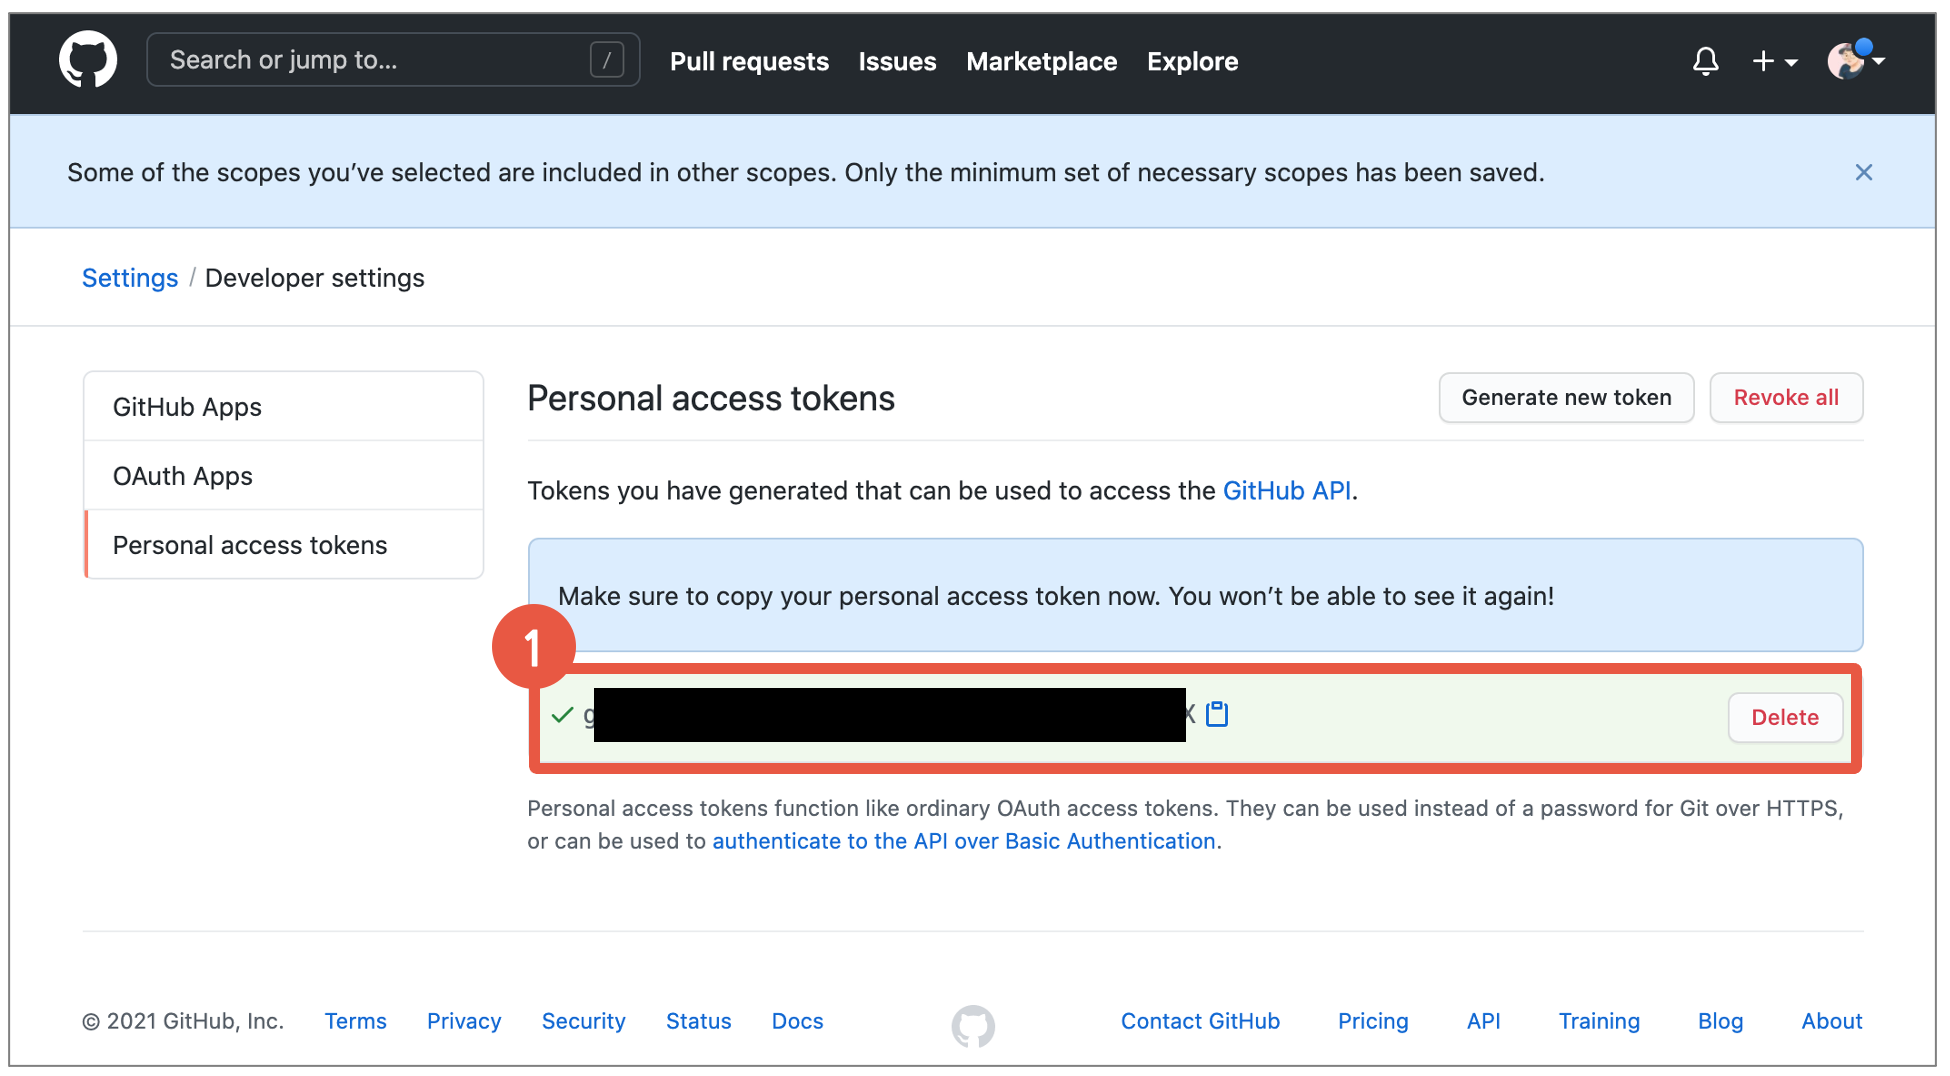
Access Token 생성이 완료되었다!
생성된 토큰값을 확인 하고, 안전한곳에 복사해두자!
이 값은 나중에 다시 확인 할 수 없으니 지금 바로 해야 한다!
이제부터는 GitHub에 push 등의 작업을 수행할 때,
PW를 입력하라고 뜨면, 방금 생성한 Personal Access Token을 입력하면 된다.
혹시 MAC OS환경에서 git push 명령어를 쳤는데 잘 안 되면서 아래와 같은 로그가 뜬다면?
remote: Support for password authentication was removed on August 13, 2021. Please use a personal access token instead. ... The requested URL returned error: 403
아래 글을 참고하여 진행하기 바란다.
맥 OS: git push에서 The requested URL returned error: 403 발생 해결 방법
'개발(Development) > Etc(기타)' 카테고리의 다른 글
| Lorem Ipsum: 샘플 더미 텍스트 생성 방법(+ VSCode HTML) (0) | 2021.07.07 |
|---|---|
| 웹소켓(Web Socket) 온라인 테스트 사이트 (0) | 2021.07.03 |
| [GCP] node.js 웹 서버 배포 방법(Compute Engine VM인스턴스/구글클라우드플랫폼) (0) | 2021.04.25 |
| [GCP] Compute Engine에 VM인스턴스 생성하는 방법(구글클라우드플랫폼) (0) | 2021.04.25 |
| [애드센스] 오류 발생 해결 방법 : Failed to load resource: the server responded with a status of 403 () (0) | 2021.03.28 |


댓글