# Toast UI Editor기본 사용 방법
리액트에서 Toast-UI 에디터를 사용하는 방법을 정리한다.
공식홈: https://ui.toast.com/tui-editor
React Wrapper 깃허브: https://github.com/nhn/tui.editor/tree/master/apps/react-editor
1. Editor 설치
- 리액트에서 사용할 것이므로, toast ui editor의 React Wrapper 버전을 설치한다.
npm install @toast-ui/react-editor
2. 컴포넌트 적용
- 컴포넌트와 스타일을 임포트하고,
- 일반 컴포넌트 처럼 사용하면서 옵션을 설정해준다. (옵션에 대해선 주석 설명 참고)
import { useRef } from 'react';

// Toast 에디터
import { Editor } from '@toast-ui/react-editor';
import '@toast-ui/editor/dist/toastui-editor.css';

export default function ToastEditor() {

  return (
    <div>
      <h3>### Editor Toast</h3>
      <Editor
        placeholder="내용을 입력해주세요."
        previewStyle="vertical" // 미리보기 스타일 지정
        height="300px" // 에디터 창 높이
        initialEditType="wysiwyg" // 초기 입력모드 설정(디폴트 markdown)
        toolbarItems={[
          // 툴바 옵션 설정
          ['heading', 'bold', 'italic', 'strike'],
          ['hr', 'quote'],
          ['ul', 'ol', 'task', 'indent', 'outdent'],
          ['table', 'image', 'link'],
          ['code', 'codeblock']
        ]}
      ></Editor>

    </div>
  );
}
* 이 외에 더 상세한 옵션에 대해서는 아래 문서의 options 파라미터를 확인하자.
https://nhn.github.io/tui.editor/latest/ToastUIEditorCore
3. 결과 확인
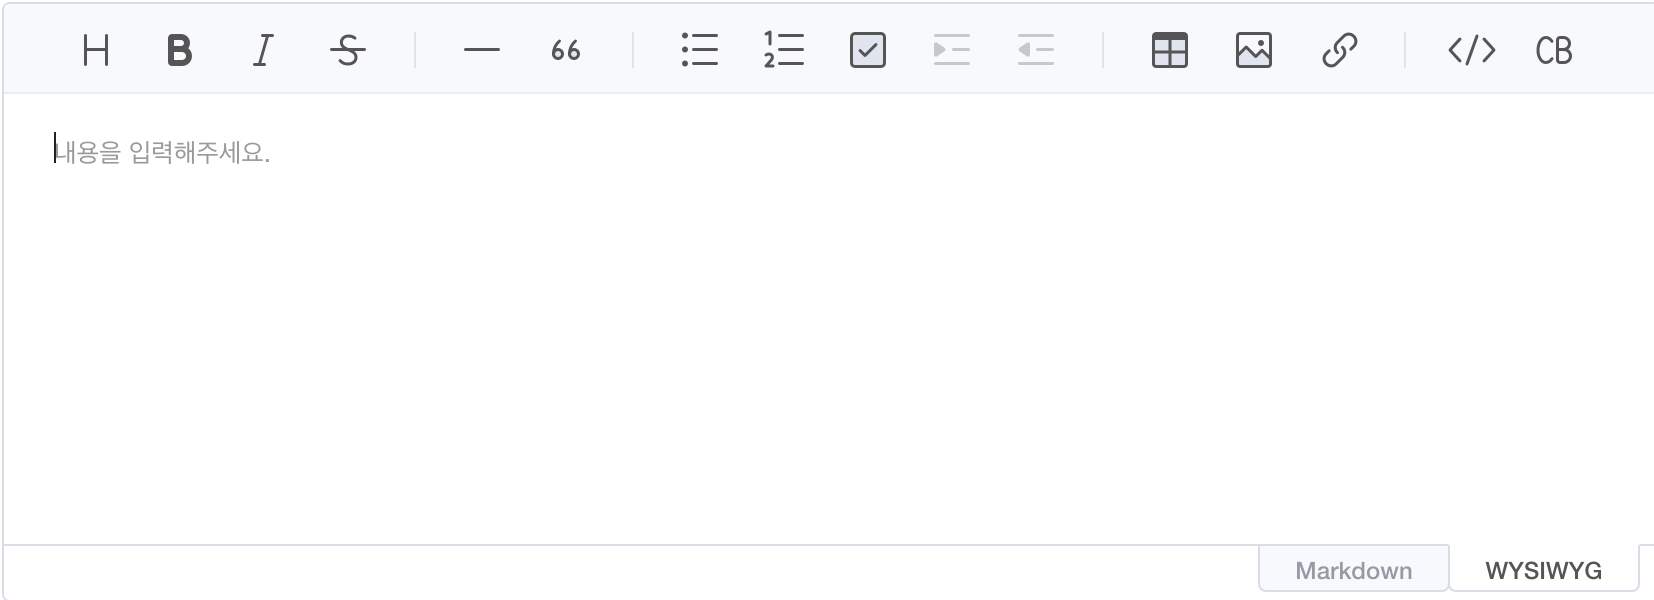
- 에디터가 잘 표시된다.

4. 에디터 입력 내용 취득
- 에디터에 입력된 내용은 아래 메서드를 통해 취득 가능하다.
// 에디터에 입력된 내용을 HTML 태그 형태로 취득
Editor.prototype.getInstance().getHTML()

// 에디터에 입력된 내용을 MarkDown 형태로 취득
Editor.prototype.getInstance().getMarkdown()
- 실제 사용한 예제 코드는 아래와 같다.
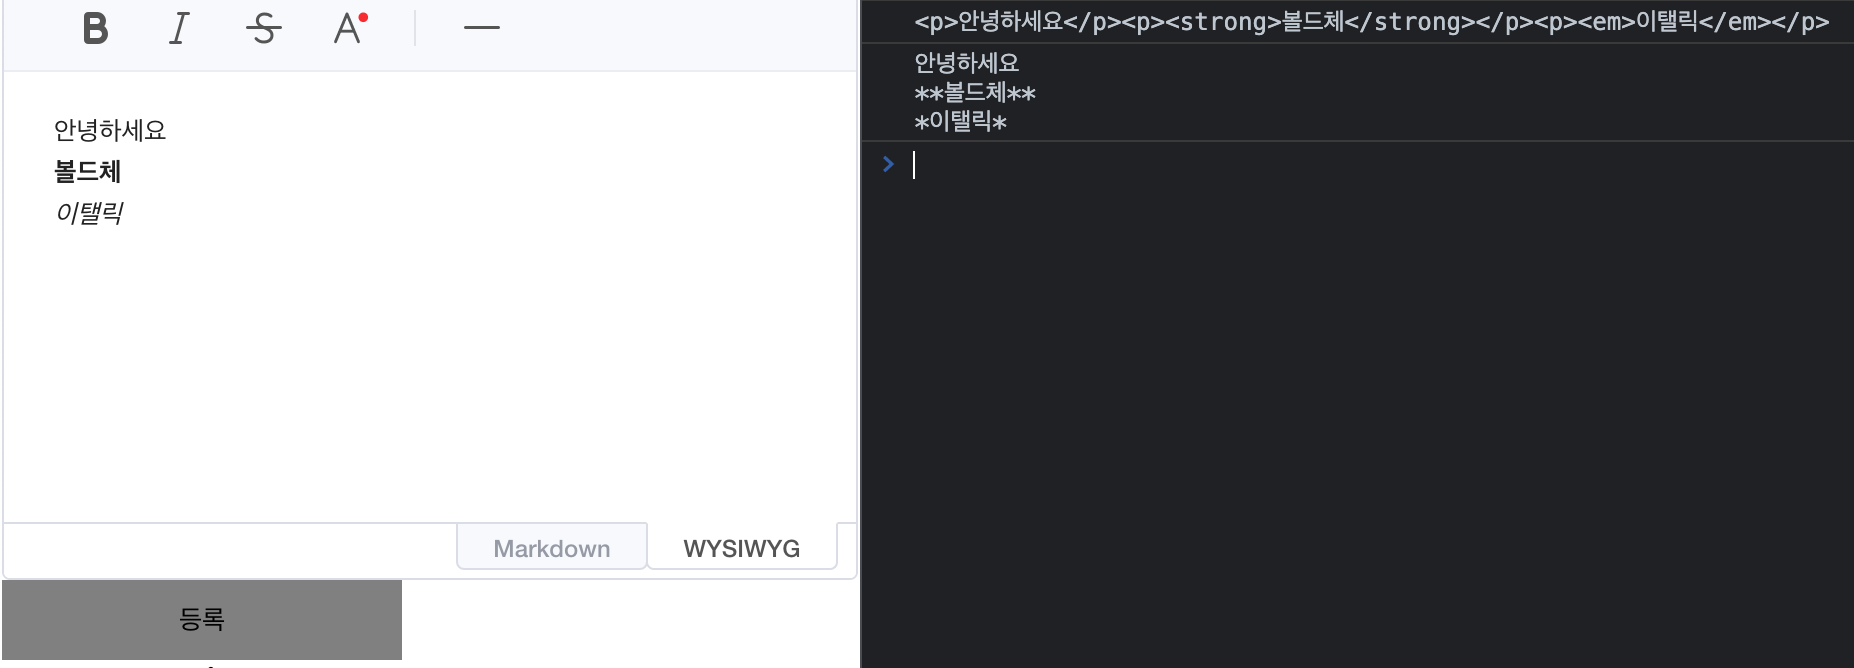
- button 클릭시, html 형식이나 markdown 형식으로 작성내용을 콘솔에 찍는다.
import { useRef } from 'react';

// Toast 에디터
import { Editor } from '@toast-ui/react-editor';
import '@toast-ui/editor/dist/toastui-editor.css';

export default function ToastEditor() {
  // Editor DOM 선택용
  const editorRef = useRef();

    // 등록 버튼 핸들러
  const handleRegisterButton = () => {
    // 입력창에 입력한 내용을 HTML 태그 형태로 취득
    console.log(editorRef.current?.getInstance().getHTML());
    // 입력창에 입력한 내용을 MarkDown 형태로 취득
    console.log(editorRef.current?.getInstance().getMarkdown());
  };

  return (
    <div>
      <h3>### Editor Toast</h3>
      <Editor
        ref={editorRef} // DOM 선택용 useRef
        placeholder="내용을 입력해주세요."
        previewStyle="vertical" // 미리보기 스타일 지정
        height="300px" // 에디터 창 높이
        initialEditType="wysiwyg" //
        toolbarItems={[
          // 툴바 옵션 설정
          ['heading', 'bold', 'italic', 'strike'],
          ['hr', 'quote'],
          ['ul', 'ol', 'task', 'indent', 'outdent'],
          ['table', 'image', 'link'],
          ['code', 'codeblock']
        ]}
        useCommandShortcut={false} // 키보드 입력 컨트롤 방지
      ></Editor>

      <button onClick={handleRegisterButton}>등록</button>

    </div>
  );
}
- 결과 화면

* 실제 서비스라면 유효성 등을 검사 후, DB에 저장하면 된다.
* 주의! 이미지 추가시, 파일 업로드 형태가 아니라 이미지 자체를 base64로 인코딩한 형태의 img 태그로 말아주니 주의해서 사용하자!
* 글자 색상 설정을 위한 colorSyntax 플러그인 적용 방법은 아래 글 참고
[React] Toast-UI Editor 폰트 컬러(글자 색상) 설정 color-syntax 플러그인 사용 방법
* 에디터로 작성된 HTML, MarkDown을 화면에 표시하는 Toast-UI Viewer 사용법은 아래 글 참고
[React] Toast UI Viewer 사용 방법: HTML태그, Markdown 표시 뷰어
'개발(Development) > React(리액트)' 카테고리의 다른 글
| [React] Toast UI Viewer 사용 방법: HTML태그, Markdown 표시 뷰어 (0) | 2022.05.16 |
|---|---|
| [React] Toast-UI Editor 폰트 컬러(글자 색상) 설정 color-syntax 플러그인 사용 방법 (0) | 2022.05.16 |
| [React] Toast-UI 에디터 관련 에러: Failed to parse source map (0) | 2022.05.15 |
| [React] 리액트v18 버전 다운 에러 해결 방법 : Cannot find module 'react-dom/client' (0) | 2022.05.15 |
| [React] 라이브러리 설치 에러: ERESOLVE unable to resolve dependency tree (0) | 2022.05.15 |


댓글